


Learn how to add logo image into Shopify packing slip template in a few easy steps with a practical guide by our Shopify expert.
You are a Shopify store owner who wants to build a strong identity of your brand then adding your brand logo into Shopify packing slip templates is the best way to do so. We added the image of the default slip temple, which does not come with a logo.
Custom Shopify Dropshipping Store Design at $499
Why Add Logo to Your Shopify Packing Slip?
When you add your brand logo to Shopify packing slips, it can boost your brand value and impact your business sales. Let’s learn about the different benefits of adding a logo to slip.
- Help customers to remember your brand.
- Enhance professionalism and boost brand credibility.
- When you add your brand logo to a packing slip, it creates opportunities for marketing and serves as a reminder of your brand.
- It can increase repeat business by creating a consistent and recognizable brand experience.
Before you go to add a logo to the packing slip, look at what the default packing slip looks like.
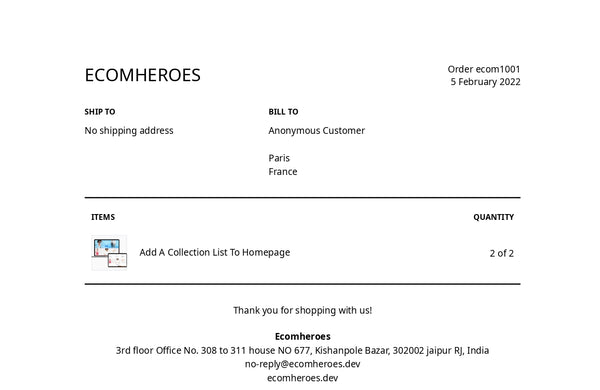
You can see the default packing slip has item details, your brand name, company address, and order number but not the logo on it.
Contact Us to for Any Shopify Help
Step-by-Step Guide: How to Add Logo Image into Shopify Packing Slip Template
Follow the simple steps below to successfully add a logo to your Shopify slip.
Step 1: Upload Your Logo File
- Log into Your Shopify Store
The first and most important step is to log into your Shopify dashboard.
- Navigate to The Content Section
Now, on the left-hand menu in Shopify admin, click on "Content" A dropdown will open and then select "Files".
- Upload Your Logo
Click on the "Upload Files" button in the top right corner, choose your logo, and upload it.
Tip: It's best to use a logo size of around 192x80 pixels for an optimal fit, and the file format can be PNG, WEBP, JPEG, or SVG.
- Copy the File URL
Once the upload is completed, click the "Link" icon next to your logo. This will copy the file URL to your clipboard for later use.

Step 2: Go to the Packing Slip Template
-
Go to Shopify Settings
From your dashboard, click on "Settings" or on the "Gear" icon to open settings, where you will find the packing slip option.
- Navigate to the Shipping and Delivery Section
In the settings menu, click on the "Shipping and delivery" option.
- Edit the Packing Slip Template
To edit packing slips, scroll down to find the "Packing slips" section. If you find it, then click on "Packing slip template".
After clicking, a Shopify liquid code file editor will open.
Step 3: Add the Logo Above the Footer to the Packing Slip Template
- Find the Correct Section in the Code
In the liquid code editor, search for the class "footer". To find it, press "Control + F" or "Cmd + F" if you have a Mac. Now, type the footer word in it and click on the Next button. Now, the footer is highlighted.
- Insert the Logo Code
Add the following HTML code above the <div> tag containing the "footer" class by placing the cursor before <div> and then pressing the enter button.
This will add a blank line where you have to paste the code below:
Copy code
<div style="text-align:center;">
<img src="YOUR BRAND LOGO URL" width="200px" height="auto">
</div>
- Replace "YOUR BRAND LOGO URL" with the link to the logo you copied earlier.
- You can adjust the max-width and height values to suit the dimensions of your logo.
Step 4: Optional – Place the Logo at the Top of the Packing Slip
- Place Logo at The Top
With the above steps, you can add the logo in the footer, but if you want to also place the logo on the top of the packing slip by pasting the code at the very beginning of the template.
- Preview and Save
Before you save all the changes to the preview template, click on the “Preview template” button in the top right corner; if the changes look exactly like you want, click on the “Save” button at the bottom of the page.
Tips:
- We suggest you choose the logo size that fits.
- Make sure the logo dimensions in your code match the file's dimensions to avoid pixelation. For instance, when the logo's original width is 50px and 200px in code, then your logo will definitely be pixelated.
- You can adjust the pixel value as needed by the width and height tag in the code you pasted, but keeping it consistent will prevent distorted or blurry images.
Conclusion
If you follow each step carefully, you've successfully added your logo to the Shopify packing slip template! This small addition to the Shopify packing slip can enhance branding and create a more professional-looking slip. If you still have questions, you can contact us. We have a team of Shopify expert developers who can help you to customize your Shopify store.
Also read: How to Add Another Admin to Shopify?